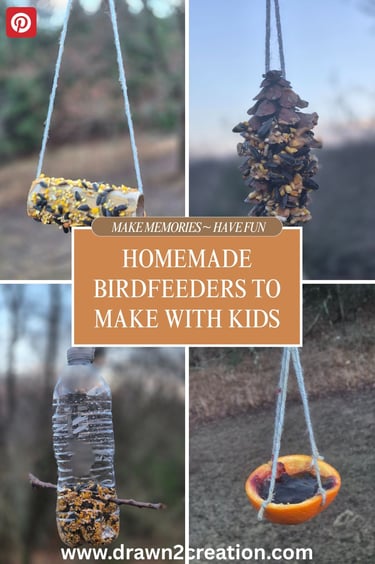
Homemade Birdfeeders to Make with Kids
Making birdfeeders is a great hands-on activity to do with children. It is fairly easy to do, it gets kids using their hands, and it provides a food source for birds in your backyard. This blog post will share steps to make several simple birdfeeders. Have fun creating!
OUTDOOR TIPS
4/1/20258 min read


Simple Birdfeeders to Make with Kids
Making a birdfeeder is something that most kids enjoy. The activity allows them to work with their hands to build something, to get a little crafty and creative, and to help animals around their homes as well! Kids feel productive and useful and they enjoy seeing which birds end up making their way to enjoy the seed from their homemade birdfeeder. Here are a few ideas for you!
Quick links to feeders:


Note: I recommend products on this page. As an Amazon affiliate, I earn from qualifying purchases (at no additional cost to you).
Click to pin for later
Do you want a ready-made kit option? Check out our Tweet Treats - DIY Birdfeeder Kit for Kids! 🐦
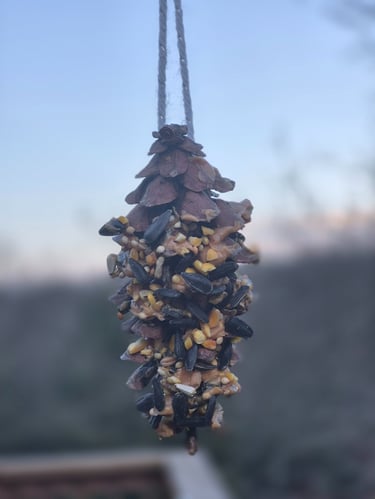
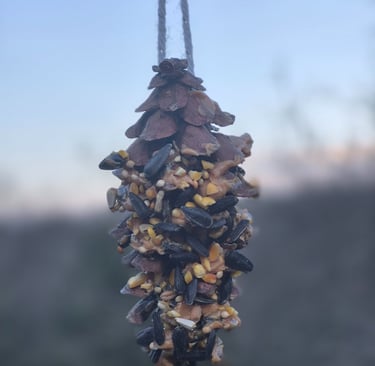
Pine Cone Birdfeeders
Materials Needed:
How to Build It:
Pinecone birdfeeders are a great choice because they look beautiful and natural when you hang them from a tree branch. Because of their small size, these types of feeders work best for small birds, like chickadees, wrens, nuthatches, or other small songbirds. These feeders are best for the fall and winter months. This ensures the peanut butter or shortening will not melt in the warm late spring or summer months.
If the pine cone is closed, you will need to get it to open up. You can do this by putting it on a baking sheet (put parchment paper underneath in case sap drips out), and then baking it in a 200 degree (Fahrenheit) oven for half an hour. Let it cool before moving on to the next step.
Tie a piece of string, fishing line, or twine securely around the top of the pine cone. You may need to work the string under the open flaps of the pine cone. Be sure to leave enough length to hang it from a tree branch later.
Use a butter knife or spoon to spread peanut butter (or vegetable shortening) all over the crevices of the pine cone. Really slather it on! The thicker it is, the better it holds the birdseed.
Pour the birdseed onto a plate or shallow dish. Roll the peanut butter-covered pine cone in the seeds. Once it seems to be mostly coated, take small a spoonful of birdseed and drop it onto any bare areas. Gently press on the birdseed into the peanut butter to ensure the seeds stick well.
Hang the pine cone birdfeeder. Choose a tree branch or a hook that is away from strong winds but visible to birds.
Wait and watch for the birds to find the feeder!
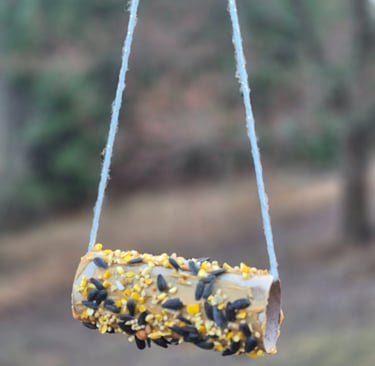
Toilet Paper Roll Birdfeeders
Materials Needed:
How to Build It:
Toilet paper roll birdfeeders are a nice choice because they use materials you likely have around the house. You get to reuse would-be trash into a useful resource for birds in your backyard! Because of their small size, these types of feeders work best for small birds, like chickadees, wrens, nuthatches, or other small songbirds. These feeders are best for the fall and winter months. This ensures the peanut butter or shortening will not melt in the warm late spring or summer months. Additionally, heavy spring rains may make the feeder soggy.
Use a butter knife or spoon to coat the entire outside surface of the toilet paper roll with peanut butter (or vegetable shortening). Be sure to get it on nice and thick! This will help the seeds to stick to it better.
Pour some birdseed onto a plate or shallow dish.
Roll the coated toilet paper roll in the birdseed. Press firmly as you roll to get good seed coverage.
Run your string, twine, or fishing line through the open part of the toilet paper tube. Tie it off at the top.
Hang the toilet paper roll birdfeeder from a branch or hook. Be sure to choose a spot that is protected from strong winds, but that is visible to birds.
Have fun watching the birds feast on their new snack!

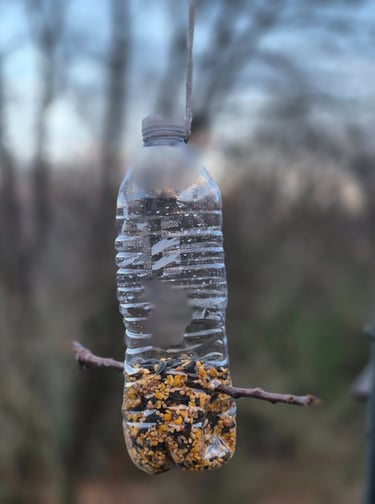
Water Bottle Birdfeeders
Materials Needed:
How to Build It:
Water bottle birdfeeders are a nice way to build a birdfeeder and use materials that would have ended up in the garbage or recycling bin. You can put those plastic water bottles to good use! These feeders are a little bit sturdier than the pine cone or toilet paper roll feeders, and they can handle small to medium-sized birds. Birds such as sparrows, chickadees, finches, wrens, and titmice will enjoy this feeder. This feeder can be used in any season. If it is used in the spring or summer, just be sure to place it in a shady area. This will help to prevent overheating and moisture buildup.
Remove the label from the water bottle and rinse it out. Let it dry completely.
Use a marker to mark an area for two holes. These holes should be on opposite sides of the bottle. They should be approximately 2 inches up from the bottom of the bottle. The holes should be approximately an inch in diameter. They should be large enough for birds to poke their heads in, but small enough that seeds won't spill out.
Carefully cut out the holes using scissors or a utility knife. Adults should do this step!
Below each feeding hole, poke a smaller hole using the scissors tip or the utility knife. Insert a small stick into the hole to serve as a perch for the birds. Poke the stick into one hole and push it through to the other side, so it exits out the opposite hole. This provides stability.
Punch two holes near the top of the bottle, on opposite sides.
Thread the string, twine, fishing line, or wire through. Tie it securely to create a loop. Alternately, you can tightly tie the string around the neck of the bottle and then create a hanging loop.
Use a funnel to pour birdseed into the feeder.
Screw the cap back on and hang it!
Wait for the birds to find your delicious treat!

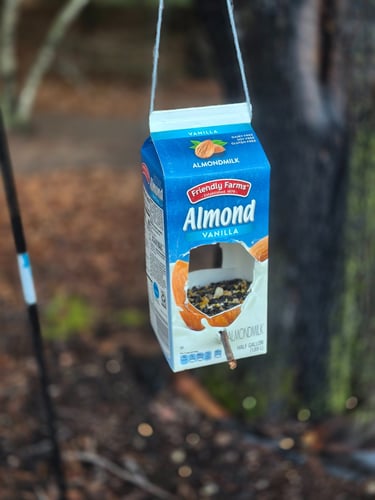
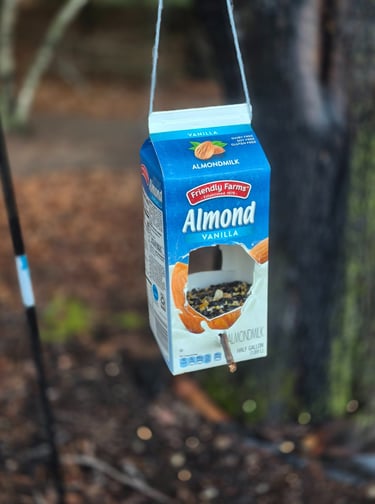
Milk Jug Birdfeeders
Materials Needed:
How to Build It:
A milk jug birdfeeder is another great way to use an item from your home that may be headed for the recycle bin or landfill. The larger size of the milk jug makes this type of feeder ideal for medium to large-sized birds such as cardinals, blue jays, mourning doves, and sparrows. These feeders can be used in all seasons. If you are using them in the warmer months, be sure to keep them in a shady area to prevent overheating and moisture buildup. Birds won't want moldy seeds!
Remove any labels from the milk jug. Rinse it out, and let it dry completely.
Use a permanent marker to mark areas for two large holes on opposite sides of the milk jug. These holes should be at least two inches up from the bottom of the jug. They should also be a few inches in diameter to allow for larger birds to access the feeder.
Use the scissors or utility knife to cut out the holes. Adults should do this step!
Poke a smaller hole below each of the feeding holes. Push a stick into one of the holes, and then push it through the jug so it comes out the other side. This will serve as a perch for the birds.
Punch two holes near the top of the jug, on opposite sides.
Thread string, twine, fishing line, or wire through the holes. Tie securely to create a loop.
Use a hole punch or drill to create two small holes in the bottom of the milk jug. This creates drainage holes, and it helps water to drain from the seed.
Pour birdseed into the feeder. The larger holes should allow you to pour directly into the feeding holes.
Make sure the cap is on, and place the feeder in your desired location. You can hang the feeder or you can simply place it on a flat surface. A sheltered area will help to protect the seeds a bit.
Enjoy watching the birds munch on the birdseed!
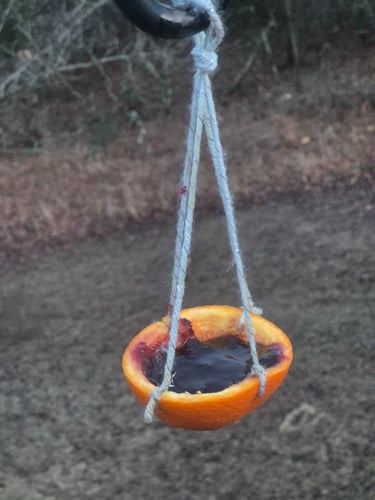
Orange Peel Birdfeeders
Materials Needed:
How to Build It:
An orange peel birdfeed is so simple and easy. It is also a great option for birds that enjoy fruit or nectar, like orioles. This type of feeder is best for summer. Wet spring rains can be tough on this feeder. It also doesn't last long in freezing temperatures.
one large orange
a sharp knife
strong string, twine, or fishing line
grape jelly (regular grape jelly will work, but here is one for birds specifically)
Cut the orange in half. An adult should do this step!
Use the knife to poke four holes in the sides of the orange. These holes should be just below the rim of the peel. Try to make the holes evenly spaced around the orange.
Tie a piece of string through a hole and knot it off. Take the other end of the same string and thread it through the opposite hole and knot it off. Repeat this step for the remaining two holes.
Take the two strings and hold them between your fingers, letting the orange dangle. Tie off a loop near the top of the string. This is the loop that you will use to hang the feeder. Note: If you are planning to hang the feeder from a branch, do not tie off a loop at the top. You'll simply hang the feeder by threading the branch through the two large string loops.
Scoop out some of the orange pulp (not all).
Fill the remaining spaces in the orange half with grape jelly.
Hang your feeder and wait for the birds to find it!

I hope you find these birdfeeder tips helpful! Have fun building, crafting, and creating with your young one. Then, enjoy sitting back to watch the birds reap the benefits of your hard work!
If you were encouraged by this post, please consider sharing it with others. The sharing options are available at the edge of the screen. 😊
We'd love to stay connected! Follow us for more content related to family, faith, and God's beautiful creation!
⭐You may also enjoy:
Click to pin for later
Do you want a ready-made kit option? Check out our Tweet Treats - DIY Birdfeeder Kit for Kids! 🐦


Be sure to check out our shop!
We have digital products related to outdoor family fun, family travel, Christmas, and more!
Join our community for updates, recommendations, and offers.
We'll give you access to our downloadable files as a thank you!
Adventure Planner
Daily Journal Template
We will send regular emails (typically monthly) with outdoor, faith, and family info you can use. You can unsubscribe from those emails at any time.
Connect
info@drawn2creation.com
Follow us!
Copyright Drawn2Creation